
Worried about tackling the screenshot feature on your MSI laptop? Fret not! It’s a breeze, and you’ll soon be a pro at capturing anything from crucial documents to hilarious memes. In this guide, I’ll walk you through the step-by-step process of taking a screenshot on your MSI laptop.
Let’s start by exploring the various methods at your disposal for capturing your screen. You can take a screenshot using the keyboard shortcut, the snipping tool, or opt for third-party software. The keyboard shortcut stands out as the most common and direct approach, allowing you to capture your screen in a matter of seconds.
Simply press “Windows” + “Print Screen” to snap a screenshot. The captured image will be neatly stored in a subfolder named “Screenshots” within your “Pictures” folder. If you’re looking to capture only a specific area, turn to the snipping tool. Just type “snipping tool” in the search bar, choose the area you want to capture, and save the image. Follow these straightforward steps, and soon enough, you’ll be effortlessly taking screenshots on your MSI laptop!
How To Screenshot On Msi Laptop?
Capturing a screenshot proves invaluable for various purposes, from saving essential information to grabbing a funny meme or troubleshooting issues on your MSI laptop. This guide walks you through the most common methods for seizing those on-screen moments.
Must Read: How to Use Hisense TV Without Remote or WiFi?
Using Keyboard Shortcuts
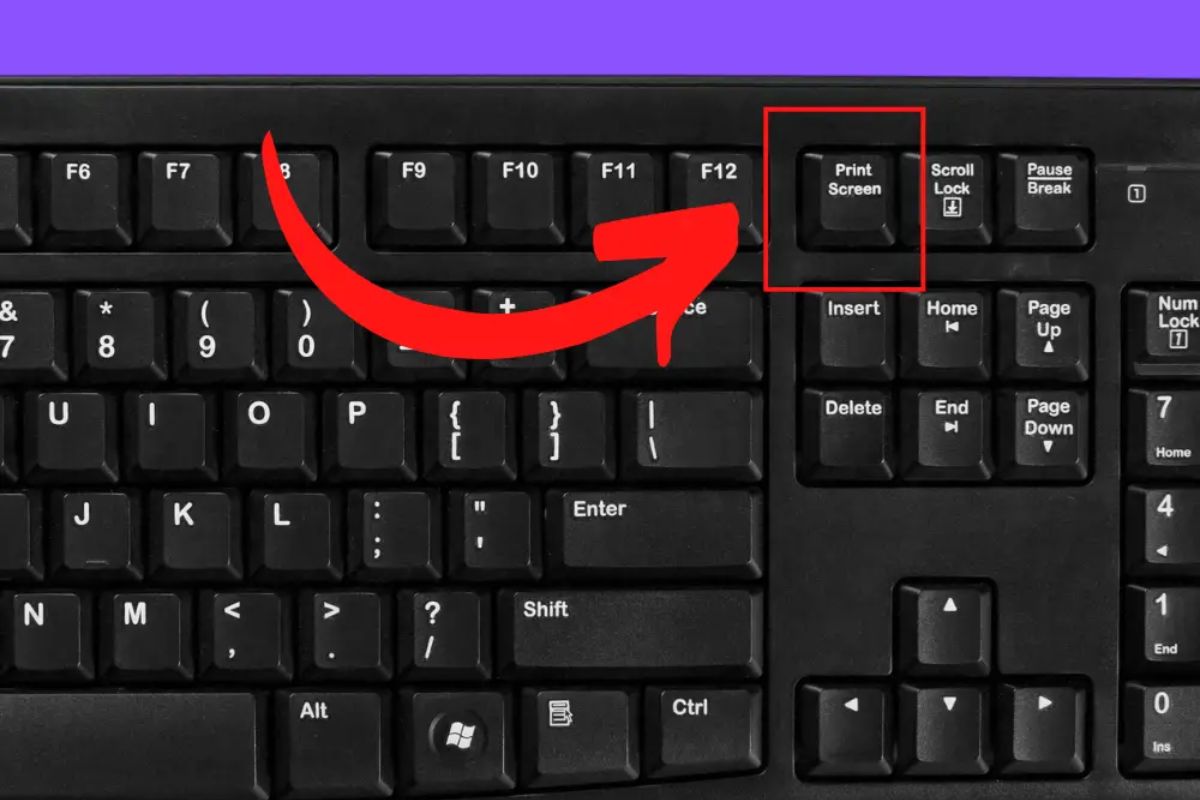
Step 1: Locate the “Print Screen” Key
Find the “Print Screen” key, often labeled as “PrtScn” or “Print Screen” on the top keyboard row.
Step 2: Press the “Windows” Key
Locate the “Windows” key, usually sporting the Windows logo near the bottom left corner.
Step 3: Take the Screenshot
Simultaneously press “Windows” + “Print Screen”; the screen flickers briefly upon capture.
Step 4: Locate the Screenshot
Find your screenshot in the “Screenshots” subfolder within the “Pictures” folder.
Step 5: Edit and Save the Screenshot (Optional)
Edit in Windows Paint if needed; click “File” and then “Save As” to save the edited screenshot.
Using MSI’s Dragon Center
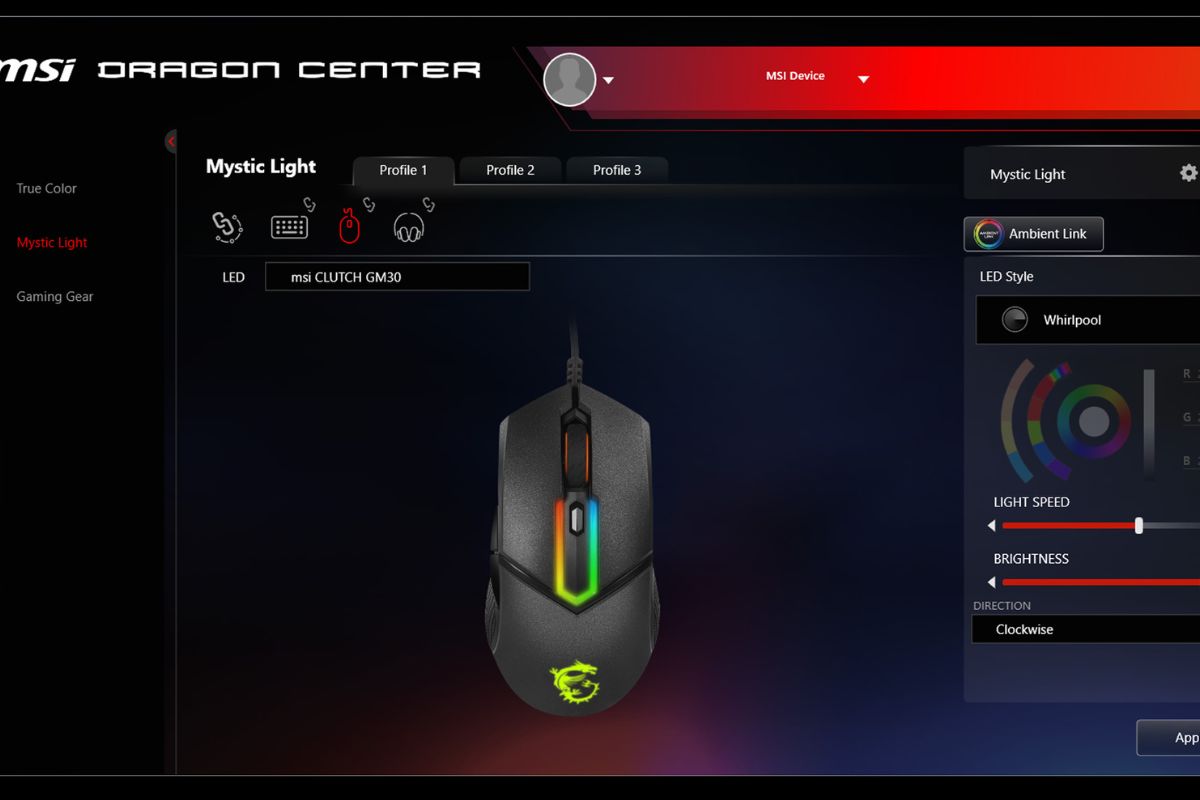
Step 1: Open MSI Dragon Center
Launch the Dragon Center software from the Start menu or system tray.
Step 2: Select “System Monitor”
Navigate to the “System Monitor” tab within the Dragon Center.
Step 3: Click on “Screen Capture”
In the “System Monitor” tab, find the “Screen Capture” button and access screen capture settings.
Step 4: Configure Screen Capture settings
Set preferences for capturing screenshots, including area selection, file format, and quality.
Step 5: Take a Screenshot
Click “Capture” after configuring settings; locate the screenshot in the default Pictures folder.
Step 6: Access your Screenshots
Retrieve screenshots in the Windows File Explorer, within the default Pictures folder.
Using Snipping Tool
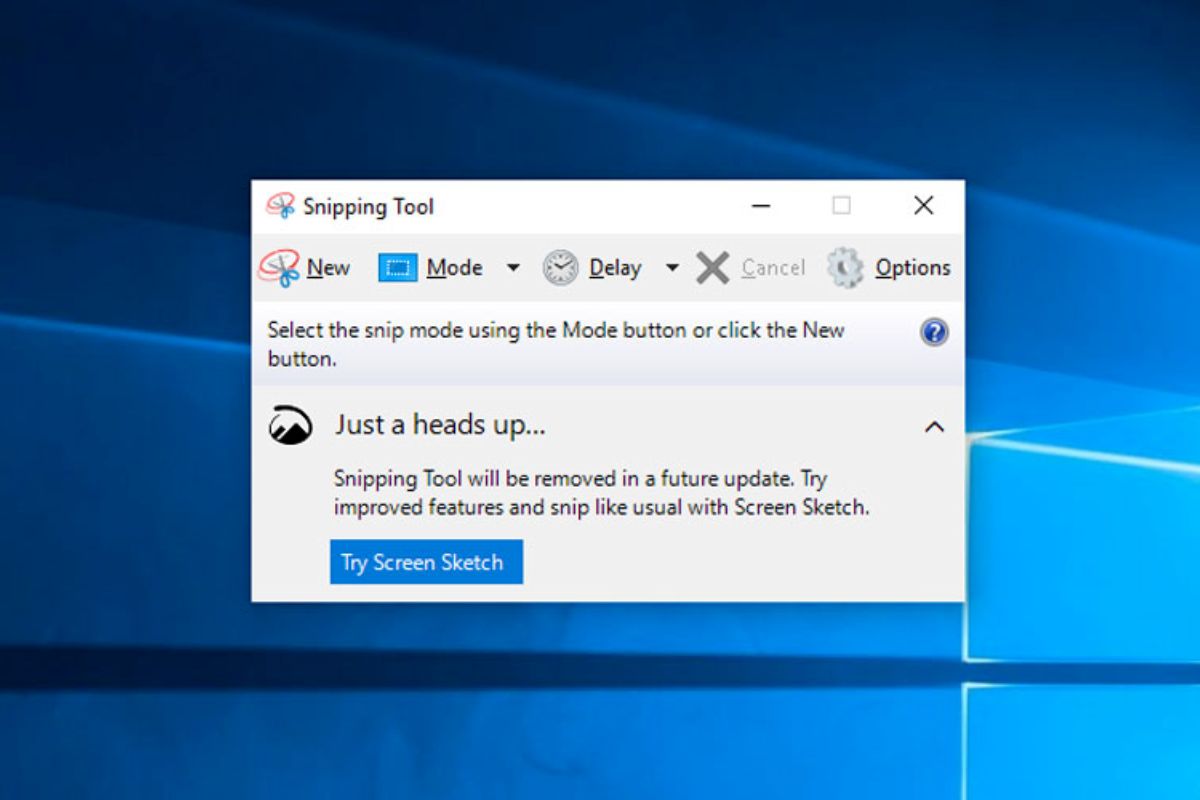
Step 1: Open the Snipping Tool
Launch the Snipping Tool from the Start menu by typing “snipping tool.”
Step 2: Choose the Type of Snip
Select from Free-form Snip, Rectangular Snip, Window Snip, or Full-screen Snip.
Step 3: Take the Snip
Use crosshairs to select the screen area; release the mouse button to capture.
Step 4: Edit the Snip (Optional)
Edit using the Snipping Tool’s annotation tools; saved image appears after editing.
Step 5: Save the Snip
Click “File” in the Snipping Tool, select “Save As,” choose location and filename, then click Save.
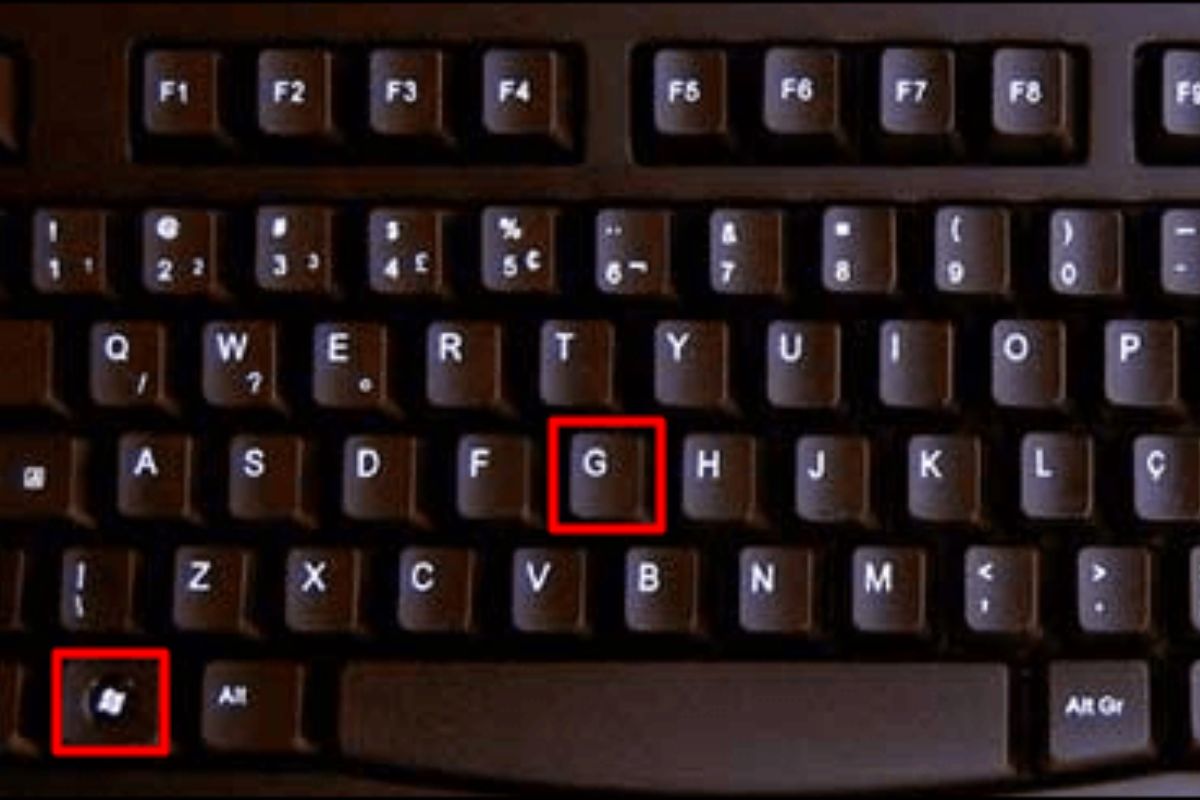
Using the Game Bar
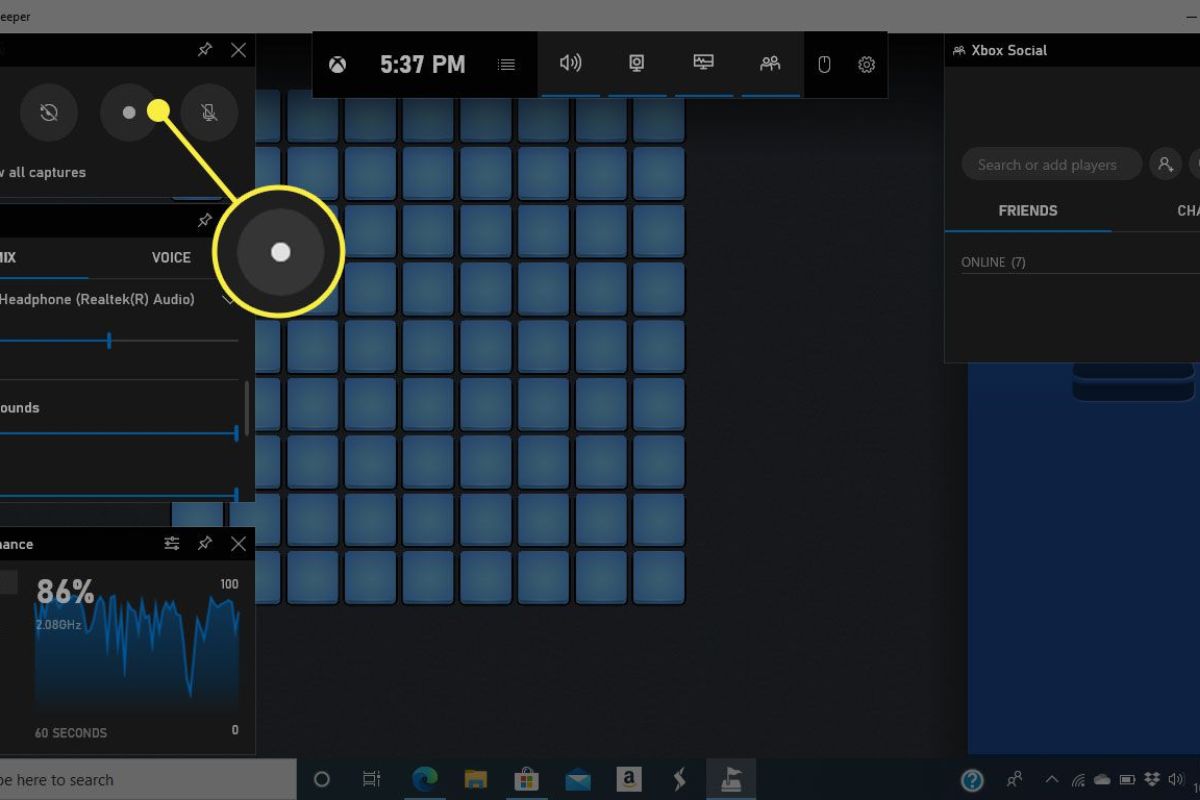
Step 1: Enable the Game Bar
Press “Windows key + G” to ensure Game Bar is enabled.
Step 2: Take a Screenshot
Press “Windows key + Alt + PrtScn” to capture; access screenshots in the default Pictures folder.
Step 3: Customize Your Screenshot
Customize in the Snip & Sketch app; click “Show all captures” to edit.
Step 4: Share Your Screenshot
Open Game Bar, click “Show all captures,” select screenshot, click “Share” to use various apps and services for sharing.
Also read: How to Delete Western Union Account?
Common Issues With Taking Screenshots On Msi Laptop
Taking screenshots proves to be a valuable feature for a range of purposes, from capturing crucial information to sharing gaming or work achievements. However, like any technology, issues can arise when attempting to capture those on-screen moments on your MSI laptop. Let’s explore some common problems and potential solutions.
Blank or Black Screen:
Encountering a blank or black screen during screenshot attempts may stem from a compatibility hiccup with your graphics card or display driver. Resolve this by updating your display driver and resetting graphics settings. Ensure that the specific program or window you aim to capture is active and not minimized or closed.
Unresponsive Keyboard Shortcuts:
If the keyboard shortcuts for screenshots seem unresponsive, the culprit could be a malfunctioning keyboard or an operating system glitch. Restart your laptop, check keyboard settings for proper configurations, or opt for third-party software or the Windows Snipping Tool as alternatives.
Screenshot Not Saving:
Discovering that a taken screenshot is missing in your designated location may signal a file system or storage device issue. Confirm ample space in your default storage location or attempt saving the screenshot to an external hard drive or cloud storage. Consider resetting default storage settings or repairing the file system if needed.
Low-Quality Screenshots:
Blurry or low-quality screenshots might result from display settings or image format issues. Enhance quality by adjusting display resolution and color settings. Avoid over-compressing screenshots and opt for saving them in a high-quality format like PNG or JPEG.
By addressing these common problems and implementing the suggested solutions, you can ensure a smoother experience when capturing screenshots on your MSI laptop for various purposes.
Final verdict
MSI laptops come equipped with a handy screenshot feature, making it easy to capture and store crucial information. To take a screenshot on an MSI laptop, simply press the “Windows” key and the “Print Screen” key simultaneously. This action captures the entire screen, storing the image neatly in the default “Screenshots” folder.
For more precision, you can capture specific areas of the screen using the shortcut “Windows” + “Shift” + “S.” This combination opens the Snipping Tool, allowing you to select and capture precisely the area you want. This flexibility ensures you can tailor your screenshots to capture exactly what you need on your MSI laptop.
Faqs About How To Screenshot On Msi Laptop
How can I take a screenshot on my MSI laptop using the Shift key?
If the standard Windows key + PrtSc shortcut isn’t working, you can opt for an alternative. Press the Shift key along with the Windows key and the S key simultaneously. This method enables you to capture specific parts of your screen using the Snipping Tool.
What if my PrtSc is on the Shift key? How do I take a screenshot?
In the scenario where your laptop’s PrtSc key is also linked to the Shift key, utilizing the Snipping Tool becomes essential. Press the Windows key, type “snipping tool” into the search box, select the type of snip you prefer, click New, choose the desired area, and save the screenshot by clicking the Save button.
Is it possible to edit screenshots on a gaming laptop?
Certainly! You can edit your screenshots on a gaming laptop using either built-in tools or third-party software. Windows 10 includes the Paint 3D app, allowing you to open a screenshot and use its tools to crop, resize, or add annotations to enhance your captured image.